


Add These Effects to Make Your Podcast Sound Consistently Great
Let's add effects, understand what these effects mean, save them as preset for later, and grab a few custom free effects at the end.

I’ve been in the radio and podcast game so long that I was using Audition when it was called Cool Edit Pro before Adobe purchased this audio editing software.
Needless to say, I’ve been editing audio for a long time.
I’ll show you my 3 (three) foundational podcast audio presets when editing episodes. Not only will this tutorial save you 30-40% of your editing time, being able to tweak effects between each track is really great, and you’ll also find yourself enjoying a consistent podcast sound too.
Adding Effects in Audition
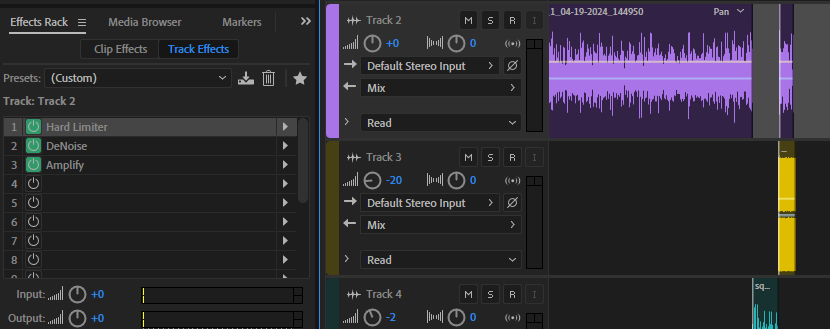
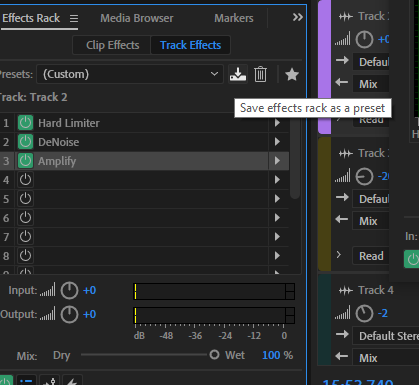
The effects rack is enabled based on the selected track (on the right side, you’ll see Track 2, Track 3, Track 4). You’ll want to click on the track you want the effects enabled on before adding your effects using this method.
In the “default view” of your audition workspace, you’ll notice the Effects Rack on the left side. If not, you’re welcome to first customize the Audition workspace to suit your needs.
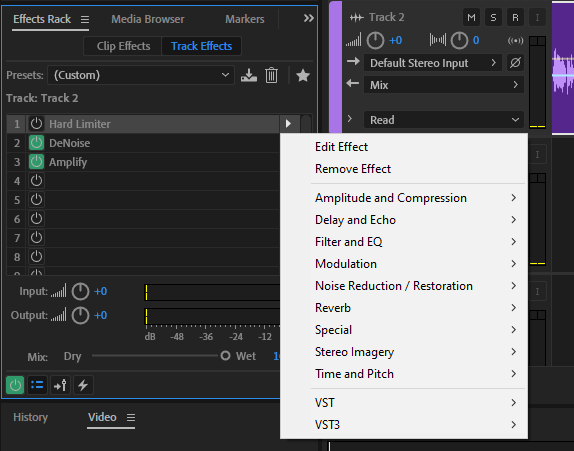
Simply click on the right arrow (even if there is no effect present) and you’ll see the effects available to you.
Turn the Effect On or Off
If you want to test, in real time, how an added effect sounds with or without the effect on, simply select the green button between the number and effect description.
You may also double click on any chosen effect to bring up a pop up window which also has the on/off button available to use so you can hear the difference that a particular effect creates in real-time.
Understanding Each Effect
I often use the Amplify, DeNoise, and Hard Limiter effects when editing most podcast episodes that have a relatively clean recording.
These three effects enabled together allows me to remove hiss or noise created from internet recording software such as Squadcast, StreamYard, or even Riverside.
This allows the episode be loud enough to hear and clean enough to avoid any distractions to the listener.
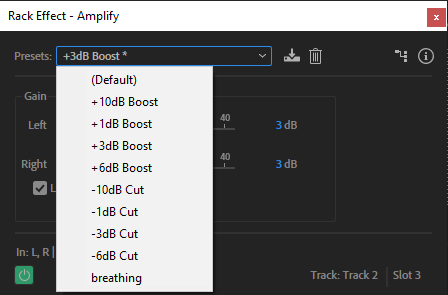
Amplify Effect
The amplify effect boosts or attenuates an audio signals. The reason I am pushing you to add your effects to a specific track is that your guest (or guests) may be considerably quieter than your guest. In this case, you have the ability to customize by how many decibels (dB) you want to increase the audio volume by.
DeNoise Effect
You’ll see two options to select from: Light or heavy noise reduction. I found that my set-up introduces more hiss when recording in OBS so I have tweaked this preset and saved a new preset to suit my needs.
Most audio recordings, in a quiet space, will only need light noise reduction. If you need to do so, press play on your audio track and select different options as your audio plays to hear what is best for your scenario.

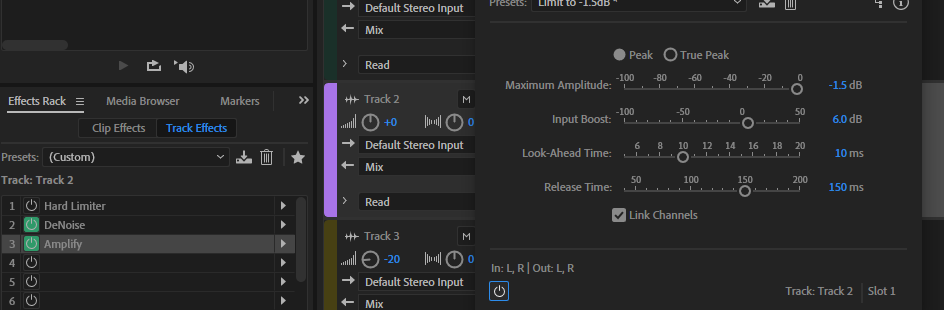
Hard Limiter Effect
You may hear some podcast (or audio) creators talk about ‘hard limiter’ and ‘normalize’ in similar scenarios.
Normalize effect processes selected audio. Audition will need to process (or review) the audio to ensure that all audio selected is (roughly) the same volume).
A hard limiter is where you’re increasing the volume of the audio and stopping at the measure selected in the drop-down. Think of it as raising all of the volume to a selected ceiling level and not a decibel (dB) more.
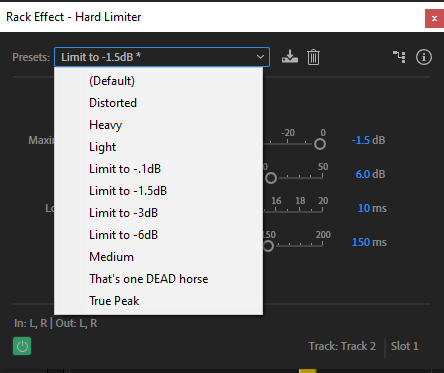
If you use the compression effect you can risk creating distorted and hard to hear audio.
I like to use the hard limiter effect to ensure that all audio is around the -3dB range. This gives some flexibility for any audio spikes (eg. someone laughs or gets excited) while being loud enough for listening in your car, small speaker, or cheaper headphones.

In need of a podcast editor with experience? My rates start at $50* per 30 minutes finished episode. Send me a message or email me to get started.
* US currency
Saving Your Effects as a Preset
Now that you have added these effects, you can save these effects as a preset. Simply click on the down arrow pushing on a rectangle icon. Chose a name for your preset and save.
The next time you open Audition, click on the track you want to add your effects on, and then select the effects preset of your choosing by using the down arrow (left of the save preset button).
I save presets for each of my podcast clients so I can open audition, import the intro to track one, speakers on tracks below, and then the outro on the next empty track after that. Now all you need to do is go in and cleaning up the non words, breaths, and annoying long rants or pauses.
If you’re interested in learning more about the effects included with Adobe Audition by default consider reviewing Adobe’s effect reference guide.
Want to explore custom/3rd party effects? Check out these free VST plugins to download (no affiliation; I just love a great free resource).